
Previous Post
Table of Contents
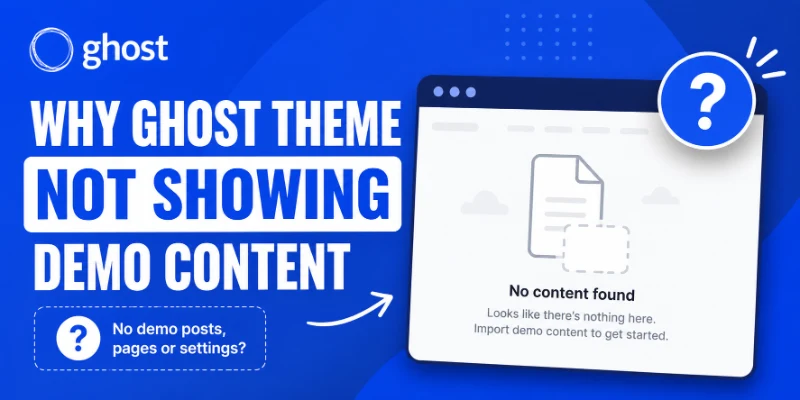
You buy or download a Ghost theme, install it, activate it, and your site looks nothing like the demo preview. It is blank, shows default content, or is missing entire sections. This is one of the most common frustrations for new Ghost theme users and it comes from a fundamental misunderstanding of how Ghost themes work. This guide explains why demo content does not appear automatically and exactly what you need to do to make your site look like the demo.
Why Ghost Themes Do Not Include Demo Content Automatically
Ghost themes are layout templates, not content packages. When you install a Ghost theme, you are installing a set of Handlebars template files that control how your content is displayed. The demo site you saw on the theme preview page has:
- Real blog posts
- Custom navigation menus
- Configured site settings (logo, title, description, accent color)
- Featured posts and tags
- A populated members/subscription setup
None of that content transfers when you install a theme zip. The theme only provides the display layer. The content is your responsibility to add.
This is the most important thing to understand: a Ghost theme that looks blank after activation is working correctly. Your site is empty because you have not added content yet.
What Actually Controls the Demo Layout
Before adding anything, it helps to understand what drives each part of a Ghost theme's appearance:
| Demo element | What controls it | |-------------|-----------------| | Featured posts section | Posts marked as "Featured" in Ghost Admin | | Tag/category pages | Posts with specific tags applied | | Hero section / banner | Site settings: title, description, cover image | | Logo in header | Ghost Admin → Settings → Design → Brand | | Navigation links | Ghost Admin → Settings → Navigation | | Author bio sections | Author profile in Ghost Admin | | Newsletter signup | Ghost Members (email list) configuration | | Accent color | Ghost Admin → Settings → Design → Brand → Accent color |
Step 1: Import the Theme's Demo Content File
Most premium Ghost themes ship with a content export file (a .json file) that you can import into Ghost. This file contains sample blog posts, tags, and navigation settings that make your site immediately look like the demo.
Look for this file in your theme download package. It is usually named:
demo-content.jsonsample-data.jsonghost-export.jsoncontent.json
Or it may be inside a folder called demo/, docs/, or extras/.
How to import demo content:
1. Go to Ghost Admin → Settings → Labs 2. Scroll to the Migration section 3. Under Import content, click Choose file 4. Select the .json file from your theme package 5. Click Import
After import, your Ghost site will have sample posts and settings that should make the theme look much closer to the demo preview.
Important: Import demo content on a fresh Ghost install or you may end up with duplicate posts. Always keep a backup export before importing (Settings → Labs → Export your content).
Step 2: Configure Site Branding Settings
After importing demo content (or if no demo content file was provided), configure your site's core settings. These settings directly control how the theme header, footer, and various sections appear.
Go to Ghost Admin → Settings → Design → Brand:
- Site title: appears in the browser tab and often the site header
- Site description: displays as the subtitle on the homepage
- Site logo: your logo file (PNG or SVG recommended)
- Site icon: favicon (square, 32×32 or larger)
- Cover image: used by many themes as the homepage hero background
- Accent color: controls buttons, links, and highlight colors
These settings power the {{@site.title}}, {{@site.description}}, and {{@site.logo}} helpers in your theme templates.
Step 3: Add Navigation Menu Items
Almost every Ghost theme demo shows a populated navigation menu. Ghost Admin → Settings → Navigation controls the primary and secondary navigation.
Click Add navigation item and add your menu links. For a typical blog/publication:
- Home →
/ - Blog →
/blog/or just/ - About →
/about/ - Tags →
/tag/[your-tag]/ - Contact →
/contact/
Save after adding each item. The theme will show the menu immediately on your live site.
Step 4: Create and Tag Your Posts Correctly
Many Ghost theme sections (like a "featured" grid, a "latest" section, or category rows) only display when posts meet specific criteria.
Featured posts: In the theme demo, the top hero section usually shows featured posts. To mark a post as featured: open the post → Post settings (gear icon) → toggle Feature this post.
Tagged posts for category sections: If the theme demo shows sections like "Technology", "Design", or "Travel", those sections are powered by tags. Each tag maps to a template in the theme. Create posts with those specific tags to populate those sections.
Check the theme documentation for which tags power which sections. Most premium theme docs list this explicitly. Common convention:
- Tag
featured→ hero/featured section - Tag
video→ video section - Tag
podcast→ podcast section
Step 5: Upload Images for Your Posts
Ghost themes display post feature images (cover images) prominently. A theme that looks great in the demo often looks plain or broken on your site because demo posts have hero images but your blank posts do not.
When creating or editing a post: Post settings → Feature image → upload an image. This image appears in post cards on the homepage, in the post hero area, and in any related posts sections.
For a quick start, use the imported demo content images or replace them with your own.
Step 6: Configure Members and Subscription Sections
Many modern Ghost themes include newsletter signup sections, member-only content sections, or subscription CTAs. These sections may appear blank or not render at all if Ghost Memberships is not configured.
Enable Memberships: 1. Ghost Admin → Settings → Membership 2. Toggle on Membership 3. Configure a free and/or paid tier as needed
If the theme shows a blank area where the newsletter signup should be, it is usually waiting for Memberships to be enabled.
Step 7: Check Theme Documentation for Required Setup
Every premium Ghost theme has documentation that explains exactly which settings, tags, and configurations produce the demo layout. This is the most important resource you have.
Look for these in your theme package:
README.mdin the zip file- A
docs/folder in the zip - A documentation URL linked in the theme purchase confirmation email
- A dedicated documentation site (common for commercial themes)
- Theme docs typically cover:
- Which tags to use for specific sections
- Required page slugs for custom pages
- Any custom settings or integrations
- How to configure the homepage layout options
Common Scenarios and What They Mean
Homepage is completely blank: No posts exist yet. Import demo content or create at least one published post.
Header shows "Ghost" instead of your site name: Update Settings → Design → Brand → Site title.
Sections appear but have no images: Posts exist but have no Feature image set. Edit each post and add a feature image.
A specific section from the demo does not appear at all: That section requires a specific tag or page that does not exist yet. Check the theme documentation.
Theme looks totally different from the demo on mobile: Take a screenshot and compare. Some layout differences between your site and the demo are caused by having fewer posts than the demo (e.g., a 3-column grid shows as 1 column with only 1 post).
Summary: Why Your Ghost Theme Looks Different from the Demo
The demo site you saw is a fully populated Ghost instance. Your new install is empty. The theme cannot fill itself with content, it only controls how content looks.
The path to matching the demo: 1. Import the demo content .json file (if provided) 2. Configure site branding (logo, title, description, cover image, accent color) 3. Set up navigation menus 4. Create posts with the correct tags for each section 5. Add feature images to posts 6. Enable Ghost Memberships if the theme uses subscription sections 7. Read the theme documentation for any theme-specific configuration
Ghost theme setup takes about 30 minutes of configuration work. After that, your site will match the demo closely and you can start replacing sample content with your own.